3. A First Look
3.1 Logging
介绍了 ESP_LOG 头文件 include "esp_log.h"
我们来看看 ESP_LOGE 的定义,这个命令意味着 log error:
Definition:
#define ESP_LOGE(tag, format, ...) ESP_LOG_LEVEL_LOCAL(ESP_LOG_ERROR,   tag, format, ##__VA_ARGS__)
烧写这个代码:
#include <stdio.h>
#include "sdkconfig.h"
#include "freertos/FreeRTOS.h"
#include "freertos/task.h"
#include "esp_system.h"
#include "esp_spi_flash.h"
#include "esp_log.h"
void app_main(void)
{
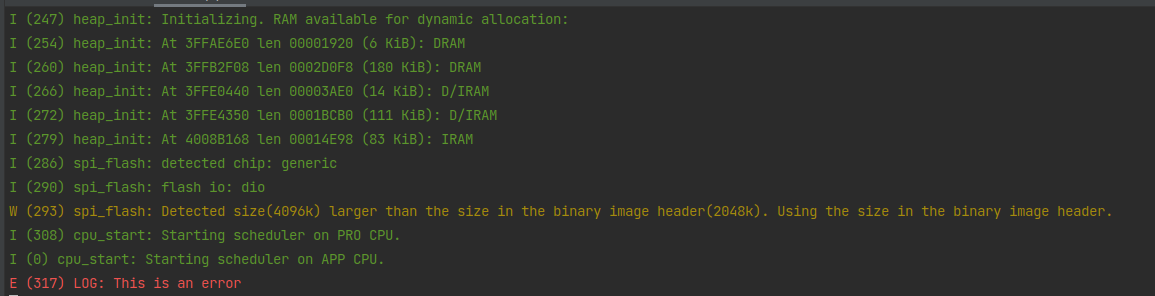
ESP_LOGE("LOG", "This is an error");
}
输出为:
剩下类似的还有:
ESP_LOGW - warning
ESP_LOGI - info
ESP_LOGD - debug
ESP_LOGV - verbose
注意ESP_LOGD 和 ESP_LOGV 默认是关闭的,要想开启,运行 idf.py menuconfig ,选择 component config - log output - default log verbosity (Info),然后选择 log 的最低输出级别,选择完毕之后 exit 即可。
例如,如果直接烧录这段程序:
#include <stdio.h>
#include "sdkconfig.h"
#include "freertos/FreeRTOS.h"
#include "freertos/task.h"
#include "esp_system.h"
#include "esp_spi_flash.h"
#include "esp_log.h"
void app_main(void)
{
ESP_LOGE("LOG", "This is an error");
ESP_LOGW("LOG", "This is an warning");
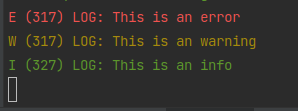
ESP_LOGI("LOG", "This is an info");
ESP_LOGD("LOG", "This is an debug");
ESP_LOGV("LOG", "This is an verbose");
}
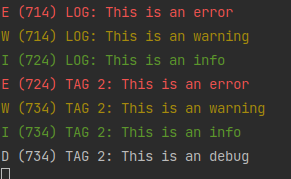
只会输出 INFO 及以上级别的 LOG:
修改 LOG 级别为 verbose 之后:
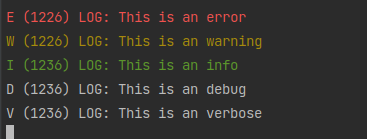
注:括号中的数字表示输出时候的时间。
我们也可以用 esp_log_level_set(tag, level); 这个函数来为特定的 tag 指定 LOG 级别。
当 default log verbosity 为 Info
#include <stdio.h>
#include "sdkconfig.h"
#include "freertos/FreeRTOS.h"
#include "freertos/task.h"
#include "esp_system.h"
#include "esp_spi_flash.h"
#include "esp_log.h"

void app_main(void)
{
    esp_log_level_set("LOG", ESP_LOG_INFO);
    ESP_LOGE("LOG", "This is an error");
    ESP_LOGW("LOG", "This is an warning");
    ESP_LOGI("LOG", "This is an info");
    ESP_LOGD("LOG", "This is an debug");
    ESP_LOGV("LOG", "This is an verbose");

    esp_log_level_set("TAG 2", ESP_LOG_DEBUG);
    ESP_LOGE("TAG 2", "This is an error");
    ESP_LOGW("TAG 2", "This is an warning");
    ESP_LOGI("TAG 2", "This is an info");
    ESP_LOGD("TAG 2", "This is an debug");
    ESP_LOGV("TAG 2", "This is an verbose");
}
输出的是:
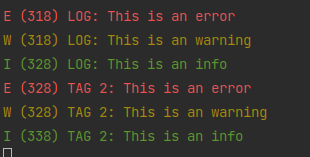
而在 idf.py menuconfig 中将default log verbosity 改成 debug 之后,输出的是:
由此可分析得知,menuconfig 中设置的是最低级别的log,而 esp_log_level_set 是在 default log verbosity 上控制的特定 tag 的 log 级别,如果没有特定设置,则以 default log verbosity 为标准。
另外需要注意,其实 ESP_LOG 系列函数和 printf 一样支持 format print,例如:
#include <stdio.h>
#include "sdkconfig.h"
#include "freertos/FreeRTOS.h"
#include "freertos/task.h"
#include "esp_system.h"
#include "esp_spi_flash.h"
#include "esp_log.h"

void app_main(void)
{
    esp_log_level_set("LOG", ESP_LOG_INFO);
    ESP_LOGE("LOG", "This is an error");
    ESP_LOGW("LOG", "This is an warning");
    ESP_LOGI("LOG", "This is an info");
    ESP_LOGD("LOG", "This is an debug");
    ESP_LOGV("LOG", "This is an verbose");

    esp_log_level_set("TAG 2", ESP_LOG_DEBUG);
    int number = 0;
    ESP_LOGE("TAG 2", "This is an error %d", number++);
    ESP_LOGW("TAG 2", "This is an warning %d", number++);
    ESP_LOGI("TAG 2", "This is an info %d", number++);
    ESP_LOGD("TAG 2", "This is an debug %d", number++);
    ESP_LOGV("TAG 2", "This is an verbose %d", number++);
}
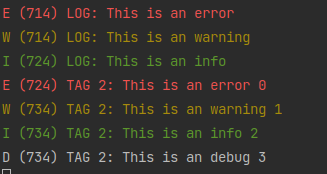
会输出:
3.2 Delays
我们需要用到这两个头文件:
#include "freertos/FreeRTOS.h"
#include "freertos/task.h"
以及这个函数 vTaskDelay (v means void)
这个函数返回的值单位是 tick,所以如果我们要换成 1000 ms,需要这样使用: 1000 / portTICK_PERIOD_MS
我们编写以下程序:
#include <stdio.h>
#include "sdkconfig.h"
#include "freertos/FreeRTOS.h"
#include "freertos/task.h"
#include "esp_system.h"
#include "esp_spi_flash.h"
#include "esp_log.h"
#define TAG "DELAY"
void app_main(void)
{
int i = 0;
while (1) {
vTaskDelay(1000 / portTICK_PERIOD_MS);
ESP_LOGI(TAG, "in loop %d", i++);
}
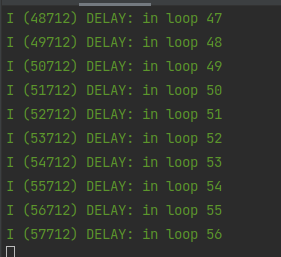
}
输出为:
3.3 Random Number
需要用到头文件 esp_random.h
编写程序如下:
#include <stdio.h>
#include "freertos/FreeRTOS.h"
#include "freertos/task.h"
#include "esp_log.h"
#include "esp_system.h"
#include "esp_random.h"
#define TAG "DICE"
void app_main(void)
{
while (1) {
vTaskDelay(1000 / portTICK_PERIOD_MS);
ESP_LOGI(TAG, "random number %d", esp_random());
}
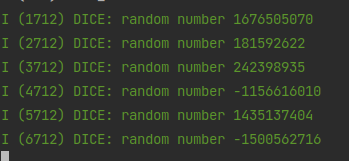
}
输出为:
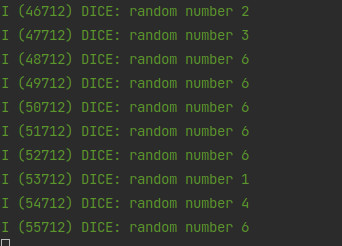
所以如果我们想编写一个骰子程序,可以这样:
#include <stdio.h>
#include "freertos/FreeRTOS.h"
#include "freertos/task.h"
#include "esp_log.h"
#include "esp_system.h"
#include "esp_random.h"
#include "math.h"

#define TAG "DICE"

int dice_role() {
    int random = esp_random();
    int positiveNumber = abs(random);
    int diceNumber = (positiveNumber % 6) + 1;
    return diceNumber;
}

void app_main(void)
{
    while (1) {
        vTaskDelay(1000 / portTICK_PERIOD_MS);
        ESP_LOGI(TAG, "random number %d", dice_role());
    }
}
输出如下:
3.4 Blinky
我们需要用到板子上自带的 led(一般是 pin 2)
我们需要用到这个库: driver/gpio.h
gpio means general purpose input output
我们这样编写程序:
#include <stdio.h>
#include "freertos/FreeRTOS.h"
#include "freertos/task.h"
#include "esp_log.h"
#include "driver/gpio.h"

#define PIN 2

void app_main(void)
{
    esp_rom_gpio_pad_select_gpio(PIN);
    gpio_set_direction(PIN, GPIO_MODE_OUTPUT);
    int isOn = 0;
    while (true) {
        isOn = !isOn;
        gpio_set_level(PIN, isOn);
        vTaskDelay(1000 / portTICK_PERIOD_MS);
    }
}
这样就可以实现 esp32 的 built-in led
其中有三个关键函数:
# 告诉 espidf 什么引脚作为 GPIO
esp_rom_gpio_pad_select_gpio(PIN);
# 告诉 espidf GPIO 的引脚作为输入还是输出
gpio_set_direction(PIN, GPIO_MODE_OUTPUT);
# 设定高低电平
gpio_set_level(PIN, isOn);
3.5 KeyBoard Input
需要用到的头文件:string.h
#include <stdio.h>
#include <string.h>
#include "freertos/FreeRTOS.h"
#include "freertos/task.h"

void app_main(void)
{
    char c = 0;
    char str[100];
    memset(str, 0, sizeof str);
    while (c != '\n') {
        c = getchar();
        if (c != 0xff) {
            str[strlen(str)] = c;
            printf("%c", c);
        }
        vTaskDelay(100 / portTICK_PERIOD_MS);
    }

    printf("you typed: %s\n", str);
}
输入 asdf 后回车,结果:
![]()